Home Blog Page 12

How to Clean and Disinfect Your Mattress Naturally?

0

If you’re lucky, you spend at least 8 hours on your mattress every night. This leaves plenty of time for sweat, dust, and dead skin to seep into your sheets and mattress. Your bedding is pretty easy to clean, but do you know how to clean a mattress yourself?

No need for a cleaning company to clean or remove your mattress, whether it is a futon, the mattress of a sofa bed, or a single mattress, or a large format 160/200, you can very well and easily undertake this task. By carrying out regular and proper maintenance of your mattress, it will last much longer!

1 – CLEAN A MATTRESS WITH WHITE VINEGAR

This solution is undoubtedly the most ecological, think about it if the others seem too aggressive to you!

The recipe: in a basin, mix 500 ml of white vinegar and 2 tablespoons of dishwashing liquid with 200 ml of lukewarm water.

Instructions

Clean: soak a sponge with this solution then wring it out. Rub the surface of the mattress with it, proceeding in squares of 20 cm on each side.

Rinse: with a glove moistened with clean water.

Dry: use a dry washcloth, which you will rub over the entire surface of the mattress.

Did you know ? White vinegar also exists in gel form, which is very practical to use.

2 – CLEAN A MATTRESS WITH SODA CRYSTALS

To do this, wear gloves and start by reading the manufacturer’s instructions for use. This is a powerful disinfectant that will allow you to tackle difficult stains.

In 2 liters of hot water, mix 2 tablespoons of soda crystals. Impregnate a sponge with this mixture, making sure to wring it out well, then rub your entire mattress with it, proceeding area by area so as not to forget any. Then rinse with clear water, always using a sponge or wrung out cloth. Finally, you can dry your mattress with a dry cloth or with a hairdryer set to a temperature that is not too hot.

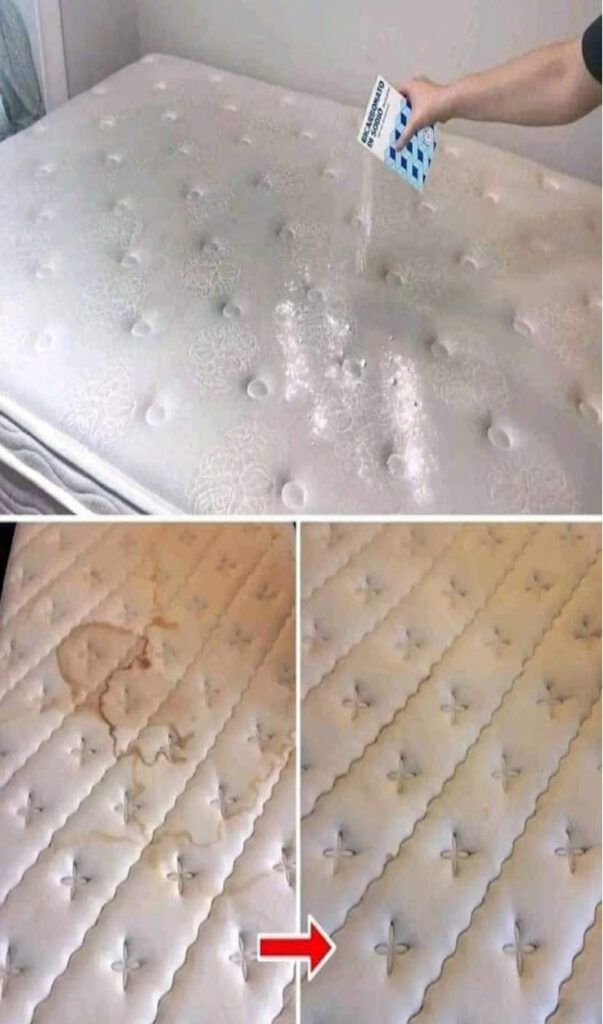
3 – CLEAN A MATTRESS WITH BAKING SODA

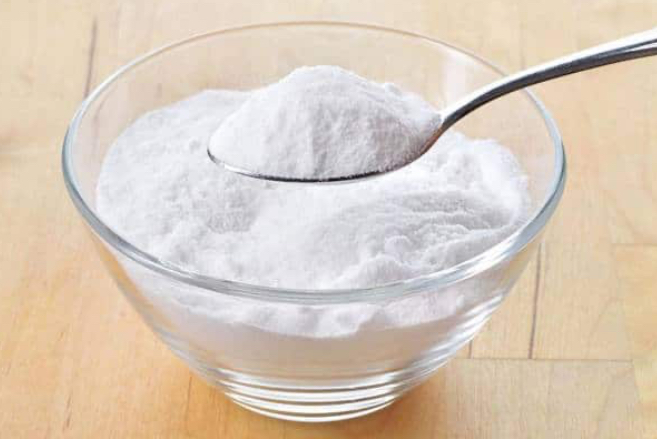
Of course, you can’t put a mattress in the washing machine, but you can remove stains and odors with baking soda. Here’s how to deep clean a mattress with this home remedy.Get rid of stains with a thick paste of baking soda and water. Spread a thick layer over the stain and let it dry for about an hour to help remove the stain from the mattress. Remove the dried powder with your vacuum cleaner.

Stubborn stains can be removed with baking soda and vinegar. Sprinkle a layer of baking soda over the stain. Using a spray bottle, spray white vinegar onto the stain. As you see, the chemical reaction causes bubbling and the stains will be removed. Let it dry and remove the residue with a vacuum cleaner.
To eliminate bad odors, sprinkle a layer of baking soda all over the mattress. Leave for a few hours, then vacuum.

4 – CLEAN A MATTRESS WITH DISHING LIQUID An

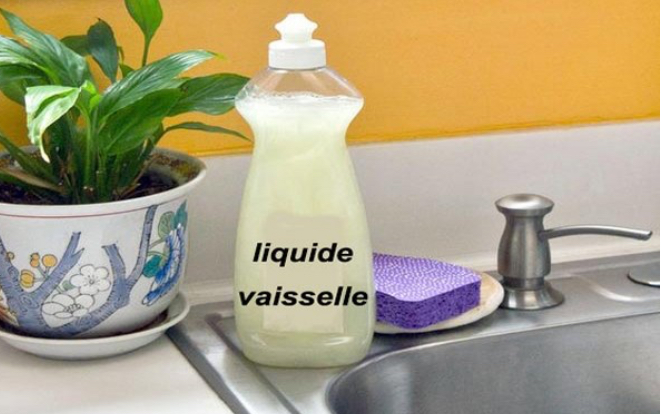
essential household product, dishwashing liquid is also frequently used to remove stains from fabrics.

Instructions

Add 3 tablespoons of dishwashing liquid to 1 liter of hot water and stir to obtain a homogeneous mixture. To be applied to the entire surface of the mattress, this very simple mixture presents no danger.
Soak a sponge or washcloth in the preparation, wring out thoroughly, and rub, not omitting any area at the risk of creating marks.
Rinse with a washcloth in clean water, press towels to absorb moisture, and let air dry.

Credit: Great Easy Recipes

Icebox Cookie Cheesecake

0

This is a tried and true recipe !! if you want to satisfy your sweet tooth, you cannot go wrong here. This is the way my Mother always made, jut give a shot it won’t fail you !

The original recipe came from Grandma’s Wonderful Sweets. . The original recipe is made in a pan in the form of a spring. I wanted to feed more, so I increased the filler by a third.Simple and easy ! My whole family loves this recipe so much. If it were for them, I’d be making this every day! Give it a shot, you’ll love it!To Make this Recipe You’ Will Need the following ingredients:

Ingredients :

° 3 c. Chocolate graham cracker crumbs (2 km from a box with 3 sleeves)

° 1/2 c. Sugar

° 12 TB melted butter

° 2 c. whipping cream

° 4 packages (8 ox each) soft cream cheese

° 1 1/3 c. Sugar

° 1 package (1 lb 2 oz kg) Oreos, each cookie broken in thirds or quarters

Directions :

Combine the Graham cracker chocolate crumbs, 1/2 cup of sugar, and 12 tons of melted butter. Press into a 13″ x 9″ skillet. Cold.

Whip the whipping cream until stiff peaks form; cool down.

In a large mixing bowl, beat cream cheese until smooth. Gradually add 1 1/3 c. Sugar; Mix well. Add the broken Oreo with the whipped cream.

The filling is evenly spread in the crust, the top is smoothed and spread to the edges. Cover and refrigerate for 4 hours or overnight.

Enjoy!

This recipe is called “Million Dollar Dip.” It’s so cheap to make and always has me feeling like a million bucks

0

Million Dollar Dip is an opulent, creamy dip that’s become a go-to for gatherings, earning its name from its deluxe taste. It pairs perfectly with a variety of dippers, from chips to crunchy vegetables to toasted bread, making it a versatile and beloved favorite.

Million Dollar Dip Recipe:

Ingredients:

1 (16 oz.) package of sour cream

4 slices of bacon, cooked and crumbled

1 cup shredded cheddar cheese

1 (1 oz.) packet dry ranch dressing mix

Instructions:

Mix Sour Cream and Seasoning: In a bowl, blend the sour cream with the ranch dressing mix until thoroughly combined.

Incorporate Bacon: Fold the crumbled bacon into the sour cream mixture.

Add Cheese: Mix in the shredded cheddar cheese until it’s evenly distributed throughout the dip.

Chill: Refrigerate the dip for at least an hour to let the flavors fuse together.

Before serving, stir the dip once more and do a taste test to see if any additional seasoning is needed. Serve it up with your chosen sides and watch as it becomes the highlight of your event.

This Million Dollar Dip, with its simple yet luxurious combination, promises to delight your guests and elevate any snack spread. Enjoy sharing this rich and scrumptious dip!

How to clean shower doors with two simple ingredients

0

Shower screens are an elegant version of shower curtains, and they are the best choice for bringing modernity and elegance to the bathroom.

Whether you have a shower or bathtub, or even a freestanding bathtub, this clear structure serves to separate the interior of the shower or bathtub from the rest of the room.

Shower screens come in different materials, colors, and textures; And although dirt eventually accumulated, it turned out to be much cleaner than the curtains. Therefore, keeping it clean will help keep it in pristine condition. Plus, cleaning shower walls is very simple.

Below we give you tips and ideas that will allow you to keep your walls always clean, without investing too much time, and by ensuring the use of hygienic products, which will not attack your faucets or the bathtub.

vinegar and baking soda

Vinegar is acetic acid and is a complete cleaning solution. The acidity helps remove dirt effectively. When you mix vinegar with baking soda, it forms carbonic acid. Carbonic acid is unstable and instantly decomposes into carbon dioxide and water. The fizz you see when you combine baking soda and vinegar comes from the carbon dioxide. Carbon dioxide is considered safe, which is why a baking soda and vinegar cleaning solution is an easy cleaning product to use around the home.

With the mixture of these two super ingredients and with the help of a soft sponge, you can quickly and easily clean glass from your walls. This mixture should form a paste that you leave on the glass for at least 15 minutes. Finish by rinsing with plenty of water.

Another option is to just use vinegar, but this time with the same amount of water in a spray bottle. In the same way, leave the mixture to act for at least 5 minutes, then remove it with plenty of water.

Clean windows

The glass cleaner sold in all supermarkets is a less artisanal, but more effective trick for increasing the protection of your shower screen from the grease and grime that soap leaves behind. Using absorbent paper, it is preferable to clean the surface when it is dry (to make it easier). Dry to a glossy surface with as many paper towels as you need, avoiding a sponge and water. This will leave a protective film on the glass which will make it last longer. Ensure that the glass cleaning fluid is non-abrasive to avoid permanent damage to the glass.

To prevent dirt from building up on your shower walls, you can also use a cleaning squeegee after every shower. A quick job can save you a lot of cleaning time in the long run.

You can also prevent fat buildup by using lemon essential oil. Rub a little bit of the oil on with a clean cloth, avoiding excess. Not only will this keep your walls dirt-free for longer, but it will also give your bathroom a fresh and pleasant scent.

One last tip, remember that even if dirt is mainly deposited on your inner wall (inside the shower or bathtub), it is necessary to clean it from both sides. This way you will get better results.

Creamy Garlic Shrimp with Parmesan

0

Creamy Garlic Shrimp with Parmesan is a deliciously easy shrimp recipe! topped with a rustic and creamy sauce, ready in under 10 minutes!

Everyone is crazy about these simple yet amazingly creamy Garlic Shrimp. Turn ingredients you probably already have in your fridge into an amazing dinner and serve  with low carb or high carb side dishes for an amazing meal! All tips and tricks included.

Shrimp Recipe

After posting this Surf & Yesterday you asked us to post this shrimp recipe separately for easy printing and saving. Well, here it is!

Based on our popular Creamy Garlic Scallops recipe, these delicious creamy shrimp go with almost anything.

Pages for

Creamy Garlic Shrimp – CARB

  • We serve our favorite over cooked rice with onions and garlic for added flavor. mm-mm-mm.
  • Pasta mixed  with olive oil, salt and garlic. Plus, a little more parmesan never hurt anyone.
  • Mashed potatoes
  • Garlic bread soaked in a creamy sauce. Heaven.

– LOW CARBS

  • Zucchini Noodles
  • Cauliflower Rice
  • Cauliflower Mashed
  • Steamed Vegetables
  • Simple Salad

With Which Wine?

That’s why I choose  white wine. Light Chardonnay or Pinot Gris go well with this. For a sweeter wine, choose  Riesling or Moscato Spumante. Tips

  • You can use shrimp with or without tails. We left ours  for  visual impact as they photograph better.
  • Try to find freshly caught wild shrimp. Frozen shrimp are good too, but fresh ones always taste better.
  • If you don’t want to use semi-salted butter, use semi-salted butter and season the shrimp to taste.
  • Feel free to use light cream (or light cream), half-and-half, or thick/condensed cream. You can also use evaporated milk as a low-calorie substitute.

INGREDIENTS

  • 1 tablespoon olive oil
  • 1 pound (500 grams) shrimp, with or without tails
  • Salt and pepper to taste
  • 2 tablespoons unsalted butter
  • 6 cloves garlic, chopped
  • 1/2 cup dry white wine* or Chicken Broth
  • 1 1/2 cup heavy cream**
  • 1/2 cup freshly grated Parmesan
  • 2 tablespoons chopped fresh parsley

INSTRUCTIONS FOR USE

  • Heat the oil in a large skillet over medium-high heat. Season the shrimp with salt and pepper and sear 1 to 2 minutes on each side until cooked through and pink. Pour into a bowl; put aside.
  • Melt the butter in the same pan. Sauté the garlic until fragrant (about 30 seconds).Pour in white wine or broth; Reduce by half, scraping  off pieces from the bottom of the pan.
  • Reduce heat to low-medium, add cream and  simmer,  stirring occasionally. Season with salt and pepper.
  • Add the Parmesan and let the sauce simmer for another minute, until the cheese melts and the sauce thickens.
  • Put the prawns back into the pan and sprinkle with parsley.For the test sauce, taste and season with salt and pepper if needed.
  • Serve with pasta, rice or steamed vegetables.

NOTES

*Use a good quality dry white wine such as Pinot Griot or Chardonnay.

white wine can also replace the chicken broth or be left out entirely. The taste of the sauce will have changed.

**In this recipe I use light cream (or light cream). Substitute  half and half if desired, being careful not to bring the sauce to a boil or it will curdle. You can also use evaporated milk as a low-calorie substitute. You can also use heavy or thickened

cream that doesn’t need to be thickened with cornstarch. Reduce the cream over low heat until thickened to your liking.

Christmas Chocolate Kahlua & Bailey’s Pudding Shots

0

I love those recipes that we all grew up with, they are just too good to miss out on.Pudding Shots are the drink/dessert combo you need for your next adult get-together! Requiring only 5 minutes of prep and 4 ingredients, you can make these with your choice of instant pudding and booze flavors. Even though Jello Shots are the go-to classic when it comes to bringing on the fun. But did you know you can make Pudding Shots, too? Yep, boozy pudding is a thing and it’s delicious!

Like with Jello shots, you can make these boozy bites with a ton of tasty variations. Made with smooth pudding and flavored alcohol or liqueur, these treats are always a huge hit! Just remember, you’ll want to keep them far away from the kiddos — they’re for adults only!

Whip up Pudding Shots in about 5 minutes, refrigerate for 30, then serve in plastic shot cups or shot glasses. Top with whipped cream and decorative garnishes and they’re ready to serve!

This is a tried and true recipe !! if you want to satisfy your sweet tooth, you cannot go wrong here. This is the way my Mother always made, just give a shot it won’t fail you !

Ingredients

1/2 cup of Red Velvet Bailey’s or you can use regular
1/4 cup of Kahlua (coffee liqueur)
1 small box JELLO Chocolate Instant Pudding Mix
3/4 cup Milk
8 oz container of Cool Whip
Christmas Sprinkles for garnish

Directions

Whisk all ingredients together in a large bowl, except for the sprinkles. Add the cool whip a little at a time.
Fill shot cups with mixture. *I used a tablespoon for filling.
Store in refrigerator or freezer.

Christmas Vanilla Red Velvet Pudding Shots

Strawberry Cheesecake Fridge

0

INGREDIENTS

  • 2 lbs. Strawberries
  • 2 Graham Cracker

Pods • 1-8 oz. Cream Cheese Package, Room Temperature

  • 1 -14 oz. Can of sweetened condensed milk
  • 2-3.Cheesecake Flavored Instant Pudding 4 oz
  • 3 cu. Milk
  • 1-12 oz. assembled cardboard topping, divided

HOW TO COOK STRAWBERRY CREAM CHEESE IN THE REFRIGERATOR

  1.  1.Wash the strawberries, trim off the tops, cut into 1/4-inch slices, and  then set aside. Line the bottom of a 3-quart skillet with 13×9  graham crackers and set aside. Combine the cream cheese and sweetened condensed milk in a large bowl and, using a food processor, beat  until smooth and creamy.
  2.  Add the pudding mixtures and milk and continue to mix on low speed 4-5 minutes or until mixture begins to thicken.
  3.  2Stir in 2 cups of heavy cream until smooth. Pour half of the cream cheese mixture over the graham crackers.
  4. Place a single layer of sliced strawberries on top of the cream cheese mixture. Top the strawberries with another layer of graham crackers, then top with the remaining cream cheese mixture.
  5. Cover the cream cheese with another layer of strawberries.
  6.  Cover and refrigerate for 6-8 hours. Sprinkle with the remaining whipped cream just before serving.
  7.  5Crush remaining graham crackers and sprinkle with crumbs

Creamy Pasta with Asparagus & Bacon

0

Creamy Pasta with Asparagus & Baconare a fun and easy recipe for your kids and family any night of the week.

This pasta dish is a delicious combination of fresh asparagus and bacon, with a light cream sauce that’s perfect for summer. The flavors blend together beautifully, and it’s so easy to make! This creamy pasta with asparagus and bacon recipe is the perfect comfort food. The asparagus gives the dish a beautiful green color, while the bacon adds a delicious smoky flavor. This dish is sure to please everyone at your table.

Looking for a delicious and easy pasta dish to make for dinner tonight? Look no further than this Creamy Pasta with Asparagus and Bacon recipe! This dish is packed with flavor, thanks to the creamy sauce, crispy bacon, and fresh asparagus. Plus, it comes together in just 30 minutes, making it the perfect weeknight meal. Serve it with a side of crusty bread for mopping up all the delicious sauce.

I love asparagus, especially when it’s incorporated into delicious dishes. My children don’t like asparagus, but they love Creamy Pasta With Asparagus & Bacon – they believe bacon makes everything better.

I love those recipes that we all grew up with, they are just too good to miss out on.

Ingredients:

8 slices bacon – chopped

8 oz. Baby-Bella mushrooms – sliced

4 cups low-sodium chicken broth

3 cups milk, divided (2 cups and 1 cup)

12 oz. Farfalle pasta (Bowtie pasta)

1 lb. asparagus – trim the tough ends and cut into 1-inch pieces

Salt and pepper to taste

4 oz. cream cheese – softened

2 Tbsp. all-purpose flour

½ cup Parmesan cheese – shredded or freshly grated

Directions:

Cook the pasta about 3 minutes less than the lowest minutes given on the package – not yet al dente. Drain the pasta, rinse, and set aside.

In a 12-inch nonstick skillet or a cast iron skillet (my favorite), cook the bacon until crispy.

Transfer the bacon to a paper towel-lined plate. Pour the bacon grease into a bowl – do not discard because you will need some later.

Using the same pan from the bacon, heat to medium heat, add the mushrooms, and season lightly with salt and pepper.

Cook the mushrooms until browned and the liquid is mostly evaporated – 4 to 5 minutes. Transfer to the same plate as bacon.

In a larger pot, add the broth, 2 cups of milk, the pasta, ½ tsp. salt and ¼ tsp. pepper.

Bring the mixture to a vigorous simmer and cook for about 8-9 minutes, stirring occasionally and moderating the heat so the mixture simmers but doesn’t stick to the bottom of the pot.

Stir in the asparagus and cook for another 4 to 5 minutes – until the asparagus is tender and the pasta is al dente but still slightly firm (it will continue to cook). There will be a bit of liquid left; that is how it should be as it will help make the creamy sauce in the next step.

In a blender, combine 1 cup of milk, cream cheese, and flour and blend until completely smooth.

Slowly add the mixture to the pot while stirring quickly to combine. Simmer for a couple of minutes until the sauce has thickened.

Remove the pot from the heat. Reserve a bit of bacon for a garnish and stir the rest of the bacon with the mushrooms into the sauce.

Stir in the Parmesan cheese.

Plate the pasta and garnish with bacon and more Parmesan cheese, if desired.

Wonton Soup

0

INGREDIENTS:

Wonton

  • 8 ounces ground beef
  • 1 tablespoon rice wine vinegar
  • 1 tablespoon soy sauce
  • 1 teaspoon sesame oil
  • 1 teaspoon freshly grated ginger
  • 1 teaspoon brown sugar
  • 2 green Onions, finely chopped
  • 24 square packages of wontons

SOUP

  • 6 cups (1440 g) chicken broth
  • 1 1/2 teaspoons minced garlic
  • 2 spoons soy sauce
  • 1 teaspoon sesame oil
  • 2-3 spring onions finely chopped

PREPARATION :

WONTONS

  • In a large bowl, combine pork, rice wine, soy sauce, sesame oil, ginger, sugar and onion. Mix well.
  • Place 1 heaping teaspoon of filling in the center of each wonton wrapper.
  • Moisten the edges with water and fold the corners to release excess air. (It should look like a triangle.)
  • Slightly lift the long edge of the wonton. Wrap the edges in opposite directions and press firmly to seal. To do this, use your finger to create a gap and moisten the edges if necessary.
  • Continue with the remaining wontons and let them rest while you make the soup.

SOUP

  • In a medium saucepan over medium heat, add chicken broth, garlic, soy sauce, sesame oil and scallions.
  • Bring about 4 liters of water to the boil in a separate large pot.When the water boils, add the wontons and cook for 5 minutes.
  • Drain the wontons and add them to the hot broth. Serve hot.

Cream Potato Soup

0

Today I’m going to share with you a simple and delectable one-pot creamy potato soup recipe! This is a favored comfort meal in my home since it is loaded with bacon and fluffy potato goodness.

This will be an excellent comfort meal for this chilly and windy weekend (is there something cozier than a pot of soup simmering on the stove while the wind howls outside your window?). None at all!?) , and while I am not a sports fan, I do know that this will be an excellent dish to prepare ahead of time and enjoy during this weekend’s big game.

Ingredients

6 slices bacon (about 6 oz.), cut into 1-inch pieces
3 tablespoons bacon grease or butter
1 cup diced onion
1/4 cup all-purpose flour
1/8 teaspoon dried thyme
2 cups low-sodium chicken broth
2 cups milk, warmed
1.5 pounds potatoes, peeled and cut into 1/2-inch pieces
1 cup shredded sharp cheddar cheese
1/2 cup sour cream
salt and pepper

Instructions

Heat a soup pot over medium-high heat.
Add bacon pieces to a soup pot over medium heat and cook bacon until crisp and fat is rendered.
Remove the bacon from the pot and set it aside.
Pour off most of the grease, but do not clean the pot (3 tablespoons of bacon grease, should remain, otherwise use 3 tablespoons of butter ).
Add onion and thyme and sauté until onion is soft, about 7 minutes.
Sprinkle the flour on top of the onion, and stir until combined.
Saute for an additional minute to cook the flour, stirring occasionally.
Stir in the chicken broth until combined.
Add potatoes, milk and cooked bacon bits, bring to a boil.
Reduce heat to low; simmer until potatoes are tender, 12 to 15 minutes.
Stirring occasionally every few minutes so that the bottom does not burn.
When the potatoes are soft, stir in the cheddar cheese and sour cream.
Season with salt and pepper.
Serve warm, garnished with desired toppings(crisp bacon pieces,cheddar cheese or green onion).