Home Blog Page 4

Christmas Cranberry Pound Cake Recipe

0

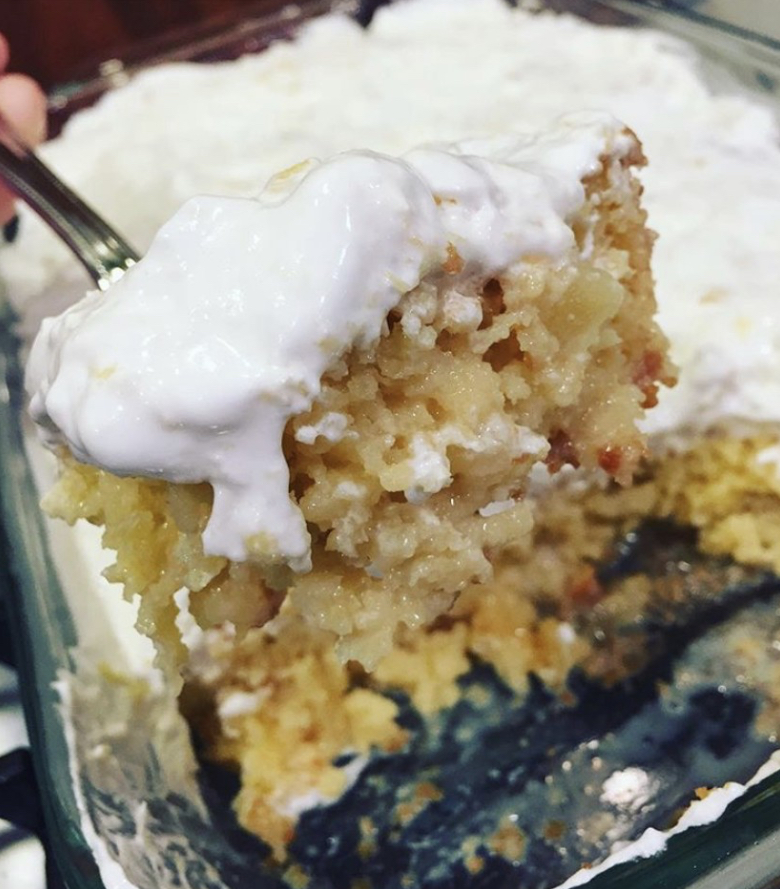
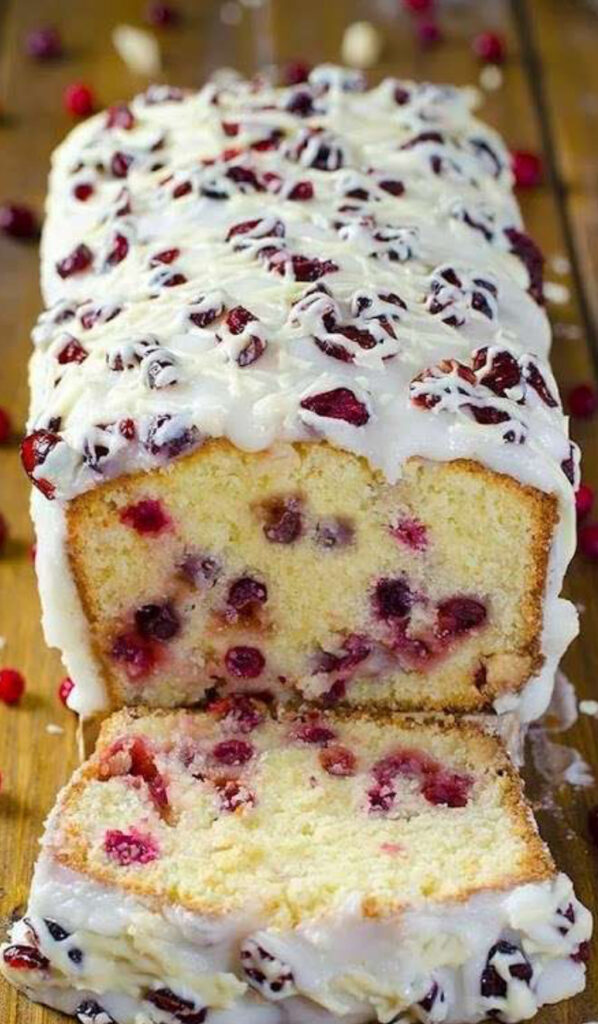
This Christmas Cranberry Pound Cake is a festive and flavorful dessert that combines the tartness of cranberries with the richness of a classic pound cake. Here’s how to make it:

Ingredients:

For the Cake:

  • 1 cup unsalted butter, softened
  • 2 cups granulated sugar
  • 4 large eggs
  • 1 teaspoon vanilla extract
  • 3 cups all-purpose flour
  • 1 teaspoon baking powder
  • 1/2 teaspoon baking soda
  • 1/2 teaspoon salt
  • 1 cup sour cream
  • 2 cups fresh or frozen cranberries, coarsely chopped

For the Glaze:

  • 1 cup powdered sugar
  • 2 tablespoons orange juice
  • 1/2 teaspoon vanilla extract

For Decoration (Optional):

  • Additional cranberries
  • Orange zest

Instructions:

1. Preheat the Oven:

a. Preheat your oven to 350°F (175°C). Grease and flour a 10-inch bundt pan.

2. Prepare the Cranberries:

a. If using fresh cranberries, chop them coarsely. If using frozen, make sure to thaw and drain any excess liquid.

3. Make the Pound Cake:

a. In a large bowl, cream together the softened butter and granulated sugar until light and fluffy.

b. Add the eggs one at a time, beating well after each addition. Stir in the vanilla extract.

c. In a separate bowl, whisk together the flour, baking powder, baking soda, and salt.

d. Gradually add the dry ingredients to the wet ingredients, alternating with the sour cream. Begin and end with the dry ingredients. Mix until just combined.

e. Fold in the chopped cranberries until evenly distributed throughout the batter.

4. Bake:

a. Pour the batter into the prepared bundt pan and smooth the top.

b. Bake in the preheated oven for 60-70 minutes or until a toothpick inserted into the center comes out clean.

c. Allow the cake to cool in the pan for 15 minutes before transferring it to a wire rack to cool completely.

5. Make the Glaze:

a. In a small bowl, whisk together the powdered sugar, orange juice, and vanilla extract until smooth.

6. Glaze the Cake:

a. Once the cake is completely cool, drizzle the glaze over the top.

7. Decorate (Optional):

a. Garnish the top of the cake with additional cranberries and orange zest for a festive touch.

8. Serve:

a. Slice and serve your Christmas Cranberry Pound Cake. Enjoy the delightful blend of flavors!

This Christmas Cranberry Pound Cake is a beautiful and tasty addition to your holiday dessert table. The cranberries add a burst of color and a hint of tartness to the rich pound cake.

Butter Pecan Cookies

0

Maybe it’s just me, but I think butter pecan is an underrated ice cream flavor. Quite often overlooked and running with the “boring” pistachio and rum raisin ice cream crowd. For the record, I love all three of these ice cream flavors! And that’s exactly why I made today’s cookie recipe. They’re salty, they’re sweet, and they’re rich with butter flavor. If it’s not their chewy edges, soft centers, and buttery flavor– it’s the toasted pecans that make these cookies so incredible. The toasty, nutty flavor of these pecans is crucial to their flavor. If you’ve never toasted nuts before adding them to a recipe, you are missing out. The flavor is 84573849% better. I actually did the calculation yesterday; it’s really that much better. Butter is where most cookie recipes begin. It has several jobs, including keeping the cookies tender and also imparting flavor. As today’s butter pecan cookies bake, the milk proteins inside of the butter begin to brown– giving these cookies a nutty flavor. Which is intensified with the toasted pecans. A win win butter pecan situation.

Not only this, how butter is mixed into cookie dough affects a cookie’s texture. In my favorite chocolate chip cookies recipe, I use melted butter. Melted butter provides a denser, chewier texture. But with today’s cookies, I chose to cream the butter and sugars together. During this creaming process, air is incorporated into the dough which, in turn, helps leaven the cookies as they bake. The cookies rise up, the centers stay soft, and the edges slightly crisp and become chewy. This cookie dough is supremely soft and a little sticky. And you know what’s best for soft, sticky cookie dough? Chilling it in the refrigerator before baking. Chill this dough for at least 3 hours and up to 3 days. Chilling allows the cookie dough to thicken and the brown sugar, butter, and toasted pecan flavor to enhance.

Ingredients :

1 cup of pecans, chopped
7 tbsp of butter, unsalted
1/3 cup of granulated sugar
1 cup of brown sugar
2 eggs
1 tbsp pure vanilla extract
2 cups all-purpose flour
1/2 tsp. baking soda
a pinch of salt
Pecan halves for the top of each cookie

Directions :

Make sure to preheat your oven to 350º and line 2 baking sheets with parchment paper.
Then beat butter, granulated sugar, and brown sugar with an electric mixer, until light and creamy.


Next, add eggs, vanilla extract, and beat again for an additional 2 minutes. Immediately add flour, baking soda, salt, and mix until just combined


When finished, scoop balls, using a medium cookie scoop onto prepared baking sheets and add a pecan half to the top of each cookie. Bake until golden brown, about 10 to 15 minutes. Finally, cool cookies on a wire rack.

CLASSIC CREAMY PEA SALAD

0

Pea Salad isn’t something that you see all that often at potlucks and picnics anymore. Pasta and potato salads seem to be the more ubiquitous choices, and while those are definitely classics, there should be room for pea salad on the menu too. It’s a classic in its own right — you might remember your mom or even your grandma serving it, but I think it’s high time that it had a revival. It’s incredibly creamy, it’s sweet, and has pops of salty bacon and sharp red onion and cubed cheddar cheese. In other words, it has all the flavor you could hope for… and it takes just about ten minutes to make. It might feel a little old-fashioned, sure, but it definitely has its place on today’s table. After all, a little nostalgia never hurt anybody.

This really is ridiculously easy to make. You’ll start with the dressing, which is a base of sour cream and mayo that’s balanced out with a little bit of sugar and some apple cider vinegar. You whisk that together and then add in thawed frozen peas, — four whole cups of them! — some chopped bacon, diced red onion, and some bite-sized cheddar cheese.

That’s it! You stir it all together and chill it until you’re ready to serve. If you’re worried about your bacon losing its texture, you can sprinkle some more on top at this point so you have some bacon flavor running throughout but still a bit of crunch.It’s about as simple as a side dish can get but it’s one that’s so easy to love. With a little bit of sweet, a little bit of salty, just enough tang, and plenty of creaminess, it’s definitely a crowd pleaser. Even if it’s not a nostalgic dish for people, they still seem to love it… and really, how could you not?

INGREDIENTS

1/2 cup sour cream
1/2 cup mayonnaise
1 tablespoon granulated sugar
1 tablespoon apple cider vinegar
1/2 teaspoon salt, plus more to taste as needed
4 cups frozen peas, thawed
8 slices bacon, cooked and crumbled
1/2 medium red onion, diced
1 1/2 cups cheddar cheese, cubed small

PREPARATION

In a large bowl, whisk together sour cream, mayo, sugar, apple cider vinegar, and salt until combined.
Add peas, bacon, onion, and cheese to bowl and gently stir to coat in dressing.
Chill until ready to serve, but at least 1 hour. Garnish with more crispy bacon if desired before serving. Enjoy!

Pineapple Condensed Milk Cake

0

Ingredients

Pineapple Cake

  • 15.25 ounces yellow cake mix (your favorite brand)
  • 20 ounces crushed pineapple in 100% juice, divided into ⅔ cup and ⅓ cup of pineapple (drain pineapple and reserve the pineapple juice)
  • ½ cup salted sweet cream butter, melted and cooled
  • 3 large eggs, room temperature

Pudding Layer and Whipped Topping Frosting

  • 6.8 ounces instant vanilla pudding mix
  • 3 cups cold whole milk
  • 8 ounces whipped topping, thawed

Pineapple Condensed Milk Cake

Instructions

  • Preheat the oven to 350°F. Generously spray a 9×13 baking dish with baker’s spray (Baker’s Joy or a generic version). Set it aside.
  • Add the cake mix, 1 cup of the reserved pineapple juice, ⅔ cup of the crushed pineapple, melted butter, and eggs to a medium-sized mixing bowl. Use a handheld mixer on medium speed to mix together the cake batter until smooth. Pour into the prepared baking dish and bake for 28 to 30 minutes or until a toothpick inserted comes out clean. Allow the cake to cool completely.
  • Once the cake is completely cool, use the rounded handle of a wooden spoon to poke holes in the cake about 1 inch apart.
  • Add the pudding mix and the cold milk to a medium-sized mixing bowl. Use the handheld mixer on low speed to combine the milk and pudding. Mix just until combined. Pour the pudding into the holes in the cake and then spread the remaining pudding over the top of the cake.
  • Add the remaining crushed pineapple to the thawed whipped topping. Stir to combine.
  • Use an offset spatula or silicone spatula to spread the pineapple whipped topping over the pudding layer. Cover and chill in the refrigerator for 4 hours to overnight. Just before serving, slice the cake into 3 slices x 5 slices giving 15 slices.

Banana Bread Cake with Cream Cheese Frosting

0

Great weekday meal !
This is a tried and true recipe !! if you want to satisfy your sweet tooth, you cannot go wrong here. This is the way my Mother always made, just give a shot it won’t fail you !

Banana Bread Cake topped with the fluffiest cream cheese frosting! Garnish this banana cake with fresh banana slices and chopped walnuts. This cake recipe is the perfect way to use up old browned bananas. Super moist, fresh banana flavor, and it bakes up perfectly each time. I secretly love it when the bananas go brown because that just means I can make this amazing banana bread cake, these cinnamon banana muffins or one of my favorite quick bread recipes this lemon blueberry banana bread.

Everything mixes in just one bowl and then the banana cake bakes up in a 9×13 baking dish. Top it off with a luscious & rich cream cheese frosting and then garnish with chopped walnuts and banana slices.To Make this Recipe You’ Will Need the following ingredients::

INGREDIENTS

Banana Cake

½ cup (1 stick) butter softened
1½ cups granulated sugar
2 large eggs
1 cup sour cream full-fat is best
1 teaspoon vanilla extract
2 cups all-purpose flour
1 teaspoon baking soda
¼ teaspoon salt
1 cup mashed bananas about 3 bananas

Cream Cheese Frosting

½ cup (1 stick) butter softened
1 bar (8 oz) cream cheese full-fat is best
1 teaspoon vanilla extract
3 cups powdered sugar
2 tablespoons heavy whipping cream

INSTRUCTIONS

Heat oven to 350°. Prepare a 9×13 baking dish and spray with cooking spray. Set aside.
In a large bowl with a hand mixer, or use a stand mixer with a paddle attachment, cream butter and sugar together until light and fluffy.


The mixture will look crumbled but beat it for a couple minuntes and it will start to look fluffy.


Add eggs, sour cream, and vanilla. Blend together until combined and creamy.
Add flour, baking soda, and salt. Blend on low speed just until combined.
Add mashed banana and gently stir together. Dump batter into the baking dish and spread out evenly.
Cook for 25-35 minutes or until toothpick inserted in middle comes out with moist crumbs or nothing at all. If a toothpick comes out with wet batter then you need to cook it slightly longer. The edges and top will be light browned.
Let cake cool completely before frosting.
Once cake is cooled you can either frost it right away and serve OR cover it tightly with tin foil and let it sit at room temperature overnight and then frost it before serving.

Make Cream Cheese Frosting

In a large bowl, beat butter and cream cheese together until combined. Add in vanilla extract, powdered sugar, and heavy cream. Beat together, starting on low speed and increase as needed, until frosting forms.
Add more powdered sugar and/or milk until desired frosting consistencey is reached. I never have to add more milk or powdered sugar than what’s called for. You want the frosting really thick so it will cut nice.
* NOTE: If you use anything other than heavy whipping cream start with 1 tablespoon and work from there. Heavy cream is so thick that you need more of it, lower fat milks you will need less of.
Cut into squares and garnish each piece with banana slices and chopped walnuts.

Beef Wellington Turnover

0

A Beef Wellington Turnover is a delightful twist on the classic Beef Wellington, combining the rich flavors of beef, mushrooms, and puff pastry in a convenient hand-held form. Perfect for elegant appetizers or a unique main course, this recipe is sure to impress your guests. Here’s how you can make Beef Wellington Turnovers:

Ingredients:

For the Filling:

  • 1 pound beef tenderloin, trimmed
  • Salt and black pepper to taste
  • 2 tablespoons olive oil
  • 1 cup finely chopped mushrooms (such as cremini or button mushrooms)
  • 2 cloves garlic, minced
  • 1 tablespoon fresh thyme, chopped
  • 2 tablespoons Dijon mustard
  • 1/2 cup pâté (optional)

For the Assembly:

  • 1 sheet puff pastry, thawed if frozen
  • Flour for dusting
  • 1 egg, beaten (for egg wash)

Instructions:

  1. Prepare the Beef:
    • Season the beef tenderloin with salt and black pepper. In a skillet over medium-high heat, heat olive oil. Sear the beef on all sides until browned. Remove from the pan and let it cool.
  2. Prepare the Mushroom Duxelles:
    • In the same skillet, add chopped mushrooms, garlic, and thyme. Cook until the mushrooms release their moisture and become golden brown. Remove excess liquid.
    • Blend the mushroom mixture to a coarse paste. This is known as mushroom duxelles.
  3. Coat the Beef:
    • Brush the cooled beef with Dijon mustard. Optionally, spread a layer of pâté over the beef.
  4. Wrap in Mushroom Duxelles:
    • Spread a layer of mushroom duxelles over the beef.
  5. Roll in Puff Pastry:
    • Roll out the puff pastry on a floured surface. Place the beef in the center and wrap it with the puff pastry, sealing the edges.
  6. Chill:
    • Chill the wrapped beef in the refrigerator for at least 15-20 minutes to allow the pastry to firm up.
  7. Preheat the Oven:
    • Preheat your oven to 400°F (200°C).
  8. Brush with Egg Wash:
    • Brush the puff pastry with beaten egg for a golden finish.
  9. Bake:
    • Place the Beef Wellington Turnover on a baking sheet and bake in the preheated oven for 25-30 minutes or until the pastry is golden brown and the beef reaches your desired level of doneness.
  10. Rest and Slice:
    • Allow the Beef Wellington Turnover to rest for a few minutes before slicing. This helps the juices redistribute.
  11. Serve:
    • Serve the Beef Wellington Turnover slices on a platter, and enjoy the layers of flavors.

Tips:

  • Customize the Filling: Feel free to customize the filling by adding ingredients like caramelized onions, spinach, or different types of mushrooms for additional depth of flavor.
  • Puff Pastry Tips: Work quickly with puff pastry to prevent it from becoming too soft. If it becomes too warm, you can chill it again before baking.
  • Make-Ahead: You can prepare the Beef Wellington Turnover up to the point of chilling and then bake it just before serving.

SALTED CARAMEL SAUCE

0

This delicious salted caramel sauce is worth making and is way better than anything you can buy in the store. What can’t be immediately improved with caramel sauce? We love adding it to our morning coffee, dipping apples in it for lunch, and pouring it over ice cream for dessert. The possibilities are endless and once you try this classic sauce, you’ll realize how you enjoy it best.

This salted caramel sauce is easy to make and only takes a few items that you probably already have on hand. The combination of heavy cream, butter, caramelized sugar, and vanilla creates a recipe that you and your family will love.

INGREDIENTS

  • 1/4 cup of water
  • One sugar cup
  • 1.5 cups of heavy cream
  • chopped into tablespoon-sized pieces, three tablespoons of unsalted butter
  • a single vanilla bean
  • 1 salt shakerful

PREPARATION

Large sauce pan over medium heat with water and sugar, stirring regularly until sugar dissolves.
Stop stirring once the sugar has dissolved, then raise the heat to high and bring to a boil. Boil the mixture for an additional 4 to 12 minutes, or until the mixture turns amber in color.
Taking the pan from the heat, slowly whisk in the heavy cream. Because the mixture will bubble up, add the cream slowly. Combine thoroughly after mixing.
Once the butter has melted completely, stir in the salt and add the vanilla salt.
In a plate, pour the caramel sauce and let it cool fully.
Reheat if necessary after storing in the refrigerator for up to two weeks.

I’ve been on a roll with this recipe, 6 times and counting!

0

Enchilada Pie is a delightful fusion of traditional enchiladas and the layered goodness of a pie. Perfect for lovers of Mexican cuisine, this hearty and flavorful dish is a treat to the taste buds. With its roots in both Mexican and Tex-Mex culinary traditions, Enchilada Pie has gained global popularity as a comfort food favorite.

When serving this scrumptious Enchilada Pie, consider accompanying it with some classic Mexican side dishes. A bright and zesty tomato and avocado salad makes a refreshing counterpoint to the rich, spicy flavors of the pie. For an extra touch of indulgence, pair it with Mexican rice and refried beans. These sides not only elevate the meal’s flavor profile but also create a well-rounded, satisfying dining experience.

Recipe for Enchilada Pie:

Ingredients:

1 pound lean ground beef

1 pound ground pork

1 diced onion

16 ounces Monterey Jack cheese, shredded

16 ounces medium cheddar cheese, shredded

8 ounces sour cream

1 can enchilada sauce

8 ounces small curd cottage cheese

1 can sliced black olives

12 fresh corn tortillas

Frying oil (for tortillas)

Salt, pepper, cumin, and garlic to taste

Optional garnishes: Chopped tomatoes, green onions, cilantro

Instructions:

Preheat your oven to 350°F (175°C).

Brown the ground beef, pork, and onion in a skillet. Season with salt, pepper, cumin, and garlic. Drain excess fat.

Heat oil in a separate skillet and briefly fry each tortilla until pliable. Drain on paper towels.

Combine both cheeses, reserving 1/4 for topping. Mix in sour cream and cottage cheese.

In a baking dish, start layering enchilada sauce, tortillas, meat, and cheese mixture.

Continue layering with tortillas, sauce, and the reserved cheese.

Top with final tortillas, sauce, remaining cheese, and olives. Add green onions or cilantro if desired.

Bake for 30 minutes.

Garnish with diced tomatoes before serving, if desired.

Indulge in the layers of savory filling, melted cheese, and crisp tortillas that make up this Enchilada Pie. It’s an ideal dish for family dinners or friendly get-togethers and is sure to be a hit at any gathering!

Low Carb Crack Slaw

0

Trying to keep the carbs down is hard, especially on the go. The easiest way to make sure of your crab count is to just make the food yourself. There are bars and baked goods that will help but just in case you are in a skillet mood, Low Carb Crack Slaw Recipe is here. This slaw is in cabbage only, it’s actually predominately meat and seasonings. The cabbage adds the crunch with out the carb numbers. It is unfortunate but must be done to stay on target and on diet. This meal is sure a tasty way to do so here.My whole family loves this recipe so much. If it were for them, I’d be making this every day! Give it a shot, you’ll love it!To Make this Recipe You’ Will Need the following ingredients:

Ingredients :

°2 pounds. Ground beef or turkey (your choice over meat)
°2 bags Dole (or other brand) classic coleslaw mix
°4 green onions
°3 tsp minced garlic (I used real garlic and cut a few slices, adjust to taste)
°3 tbsp soy sauce (I used light soy sauce to taste, this doesn’t have to be exact)
°2 tablespoons sesame oil
°2 teaspoons crushed red pepper flakes (optional)
°2 teaspoons ground ginger
*Optional, add a packet of splenda for a single serving. I haven’t done it but I’ve seen some people do.

Instructions:

In a separate pan, I put sesame oil, soy sauce, chopped green onion and chopped garlic together and sautéed until tender. I then add cabbage , crush red pepper & ground ginger & cook until almost tender, it still had a slight crunch which I prefer to super soft cabbage. Once that was done I drained the excess fat from the burger and added it to the pan with the rest of the ingredients and stirred. I added a little more soy sauce for taste but not much. Turned out awesome. Husband and son loved it. Low carb, moderate fat and moderate protein, perfect !

Enjoy !

I was hesitant to try this out at first, but I have been hooked ever since

0

Cabbage, often underrated among vegetables, can be transformed into a delightful and nutritious dish with the right recipe. Baked Cabbage Steaks are a testament to this, offering a simple yet delicious option for a healthy weeknight dinner.

I discovered this recipe in my quest to diversify my vegetable intake. Tired of regular steamed vegetables, I was eager to try something new. Baked Cabbage Steaks caught my eye as an innovative way to prepare cabbage, and though I was initially skeptical, the outcome was surprisingly delightful. The outside crispiness combined with the tenderness inside made it an instant favorite, and it’s now a regular feature in my meal plans.

Baked Cabbage Steaks Recipe

Ingredients:

1 head of cabbage

2 tablespoons of olive oil

1 teaspoon of garlic powder

1 teaspoon of onion powder

Salt and pepper to taste

Optional: garnishes of your choice

Instructions:

Start by preheating your oven to 375°F.

Slice the cabbage into thick steaks, about 1-inch thick.

Arrange the cabbage slices on a lined baking sheet.

Generously brush each cabbage slice with olive oil on both sides.

Season with garlic powder, onion powder, salt, and pepper on both sides.

Bake for 25-30 minutes, or until the edges are crispy and the center is tender.

Serve hot and enjoy the delicious blend of flavors!

Baked Cabbage Steaks are a revelation, combining simplicity with a burst of flavor. They’re a perfect choice for both cabbage enthusiasts and those new to the vegetable. This recipe proves that cabbage, while humble, can be transformed into a delectable, healthy meal. So, when in need of a quick and nutritious dinner option, Baked Cabbage Steaks are a go-to recipe worth trying.