Home Blog Page 27

My Amish neighbor shared this “Golden Stew” recipe with me and boy does it live up to its name

0

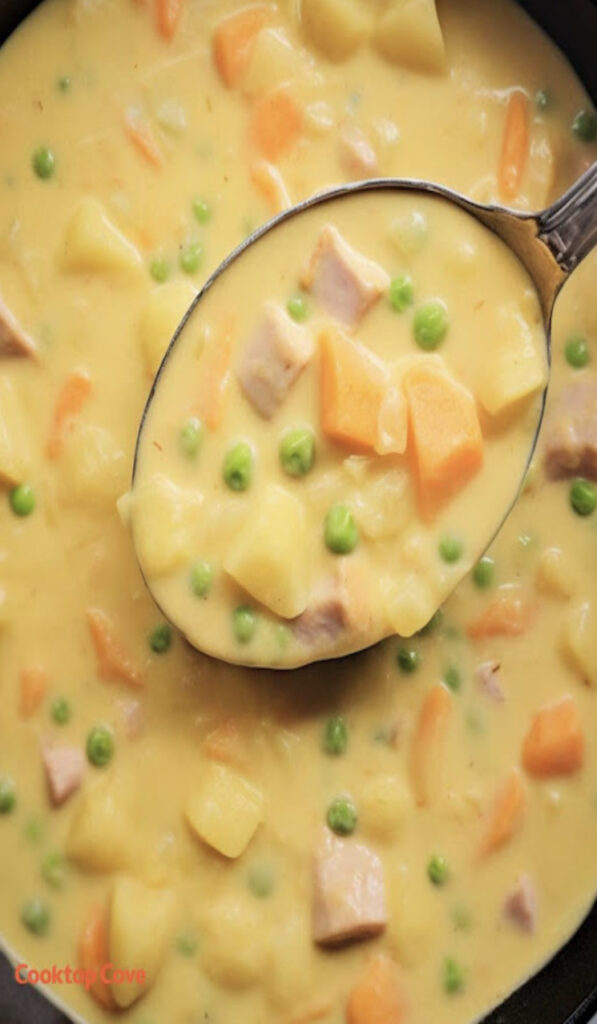
Experience the authentic flavors and traditions of the Amish community with the Golden Stew. Rooted in simplicity, this stew is more than just a dish; it’s a testament to the communal spirit, warmth, and culinary heritage of the Amish. Perfect for cold nights or family gatherings, this stew brings warmth to the table and soul.

Amish Golden Stew: A Tradition in a Bowl

Ingredients:

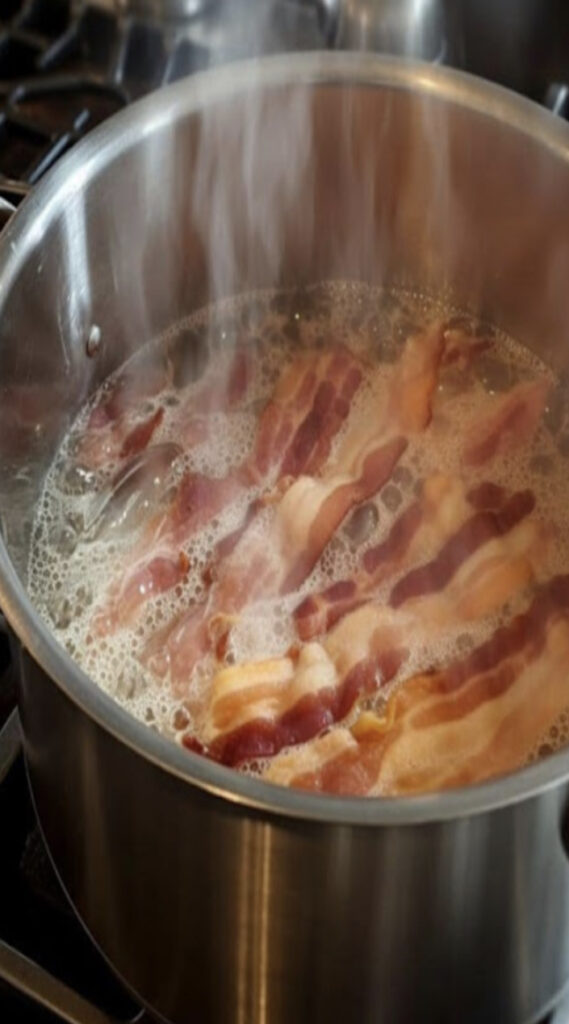
2 cups pre-cooked cubed ham

1/2 cup carrots, either sliced or cubed

1/2 cup diced onion

2 cups potatoes, peeled and cubed

10 ounces frozen peas

2 cups chicken broth

10.5 ounces celery soup

10.75 ounces cheddar cheese soup

Slow Cooker Instructions:

Into the slow cooker, add the carrots, potatoes, onion, and ham.

Pour chicken broth over the ingredients, adjusting to achieve your desired consistency.

Add both the celery soup and the cheddar cheese soup, blending well.

Cover and set to LOW for 6-7 hours or HIGH for 3-4 hours. Note that cook times might differ depending on your specific slow cooker model.

Integrate the frozen peas approximately 30 minutes before completion, ensuring they’re thoroughly warmed.

Season to your liking with salt and pepper.

Garnish with fresh herbs if desired, and serve hot.

Stovetop Instructions:

In a sizable stockpot, combine onions, carrots, potatoes, and ham. Pour in 3 cups of chicken broth and allow it to simmer until the vegetables are tender, roughly 20-30 minutes.

Integrate the cream-based soups and the peas. If a thinner consistency is desired, introduce additional chicken broth. Adjust flavor with salt and pepper.

Maintain a simmer for another 10-15 minutes until the stew is uniformly heated.

Allow it to slightly cool before serving.

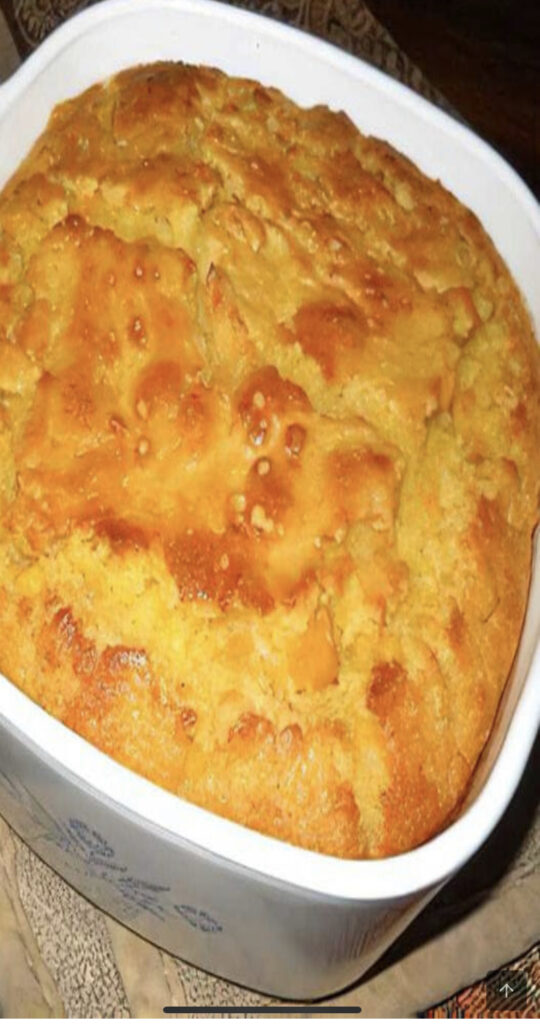
As an accompaniment, consider Amish bread, such as the well-known Friendship Bread, or a homemade cornbread, both of which are ideal for savoring the stew’s rich flavors. For a refreshing contrast, serve with a crisp salad or a dollop of homemade applesauce for a hint of sweetness.

Savor the deep-rooted tradition and warmth encapsulated in the Amish Golden Stew, and let its comforting embrace draw you back bowl after bowl.

THE ARE YOU KIDDING ME CAKE

0

This is a tried and true recipe!! If you want to satisfy your sweet tooth, you can’t go wrong here. That’s how my mom always did it, but give me a chance, it won’t let you down!

I named this cake aptly because that’s what people say when they ask for the recipe. I have an Amish friend named Rosie. She gave me this recipe one day and I didn’t believe it at first. I thought she definitely forgot an item or two. But she didn’t. It is a moist and delicious cake. No frosting is needed, so it’s a great lunchtime dessert.

Simple and easy! My whole family loves this recipe so much if it was for them I would make it everyday! Try it, you will love it! To prepare this recipe, you will need the following ingredients:

*Ingredients:

°3 large eggs

°1 box cake mix (any flavor)

°1 package pie filling (any flavor)

*Directions :

I chose yellow cake mix and peach pie filling, but you could actually choose, say, yellow cake mix and cherry pie filling and the cake would come out pink! Check it out:

You can also choose blueberry pie filling and the cake comes out with blue or chocolate cake mix and the cake comes out with, well, chocolate.

Enjoy !

Lemon Blueberry Loaf

0

This Lemon Blueberry Loaf recipe produces a perfectly moist, flavorful and delicious loaf of quick bread! Topped with a lemon glaze this easy bread recipe is a classic combination of tart, sweet, and bright flavors! Sure to be a new favorite! Serve for breakfast, snack, or dessert!

This Lemon Blueberry Bread is a delicious, flavorful quick bread perfect to enjoy along with a cup of coffee or tea. I love the bright flavors of blueberry and lemon, and they work together so beautifully in this simple loaf.

This lemon blueberry bread recipe comes together quite quickly and would beautiful for a special brunch, tea party or shower. In fact, I made this recipe with a very special occasion in mind

Ingredients

  • 1 ½ cups plus 1 tbsp all purpose flour
  • 2 tsp baking powder
  • 3 large eggs
  • 1 cup granulated sugar
  • 1 cup plain yogurt or sour cream
  • ½ tsp salt
  • ½ tsp vanilla
  • ½ cup vegetable oil
  • 2 tsp lemon zest
  • 1 ½ cups fresh or frozen blueberries

Lemon Glaze/Syrup

  • 2 to 3 tbsp lemon juice
  • 1 cup sifted confectioner’s sugar

How To Make Lemon Blueberry Loaf

  1. Preheat the oven to 350*
  2. Grease the sides and bottom of a loaf pan
  3. Sift together all dry ingredients for the bread
  4. In a large bowl, mix together all the moist ingredients
  5. Slowly add in the dry ingredients
  6. In a separate bowl, add the tbsp of flour to the blueberries and fold gently into the batter
  7. Pour the batter into the prepared pan
  8. Bake for 50 to 55 minutes. If a toothpick comes out clean the bread is done
  9. Remove from the oven and let cool for 10 minutes
  10. Remove loaf from pan and allow to cool on a cooling rack
  11. In a small saucepan on low heat, add the powdered sugar to the lemon juice and let it dissolve. Simmer for 3 minutes
  12. Using a toothpick, poke holes all over the loaf, top and sides
  13. Use a pastry brush to brush the lemon syrup on the top and the sides.
  14. Let harden for 15 minutes before serving

Old-fashioned CUSTARD PIE

0

Recall those cozy afternoons at grandma’s, the aroma of her signature custard pie wafting from the kitchen? Those days of eagerly awaiting a slice don’t have to be mere nostalgia. You can recreate that magic right in your kitchen!

Whip up this velvety Old Fashioned Custard Pie in under an hour with simple ingredients you probably already have. Not only will it win over friends and guests, but it’ll surely get a nod of approval from grandma too.

Ingredients:

1 ready-to-use pie crust

3 fresh eggs

½ cup of white sugar

A pinch of salt, about ½ tsp

A dash of nutmeg, plus some for garnishing

2-2/3 cups of milk

1 tsp of authentic vanilla extract

Let’s Get Baking:

Start by warming your oven to 350°F.

In a cozy mixing bowl, lightly beat the eggs, using either a hand mixer or good ol’ whisk.

Gently blend in the sugar, salt, a touch of nutmeg, milk, and that aromatic vanilla, mixing until it’s smooth. Don’t worry if it seems a bit runny – it’s supposed to be that way.

Carefully pour your mixture into the pie crust, ensuring it spreads evenly.

Pop it into the oven and let it bake to perfection for around 35-40 minutes.

Once it’s golden and set, pull it out and let it cool down to a comfortable room temperature.

For the final touch, sprinkle a little nutmeg on top, slice up, and get ready for a trip down memory lane. Enjoy!

When I served these at a party, people kept grabbing seconds and thirds

0

Seeking a party appetizer that’s not only mouth-watering but also an instant hit? Dive into the world of Crack Chicken Pinwheels. A tantalizing mix of succulent chicken, velvety cheese, and crispy bacon wrapped in a tender tortilla, these pinwheels are truly addictive. Be ready, once you delve in, you might find it challenging to resist the temptation!

Last summer, I prepped for a backyard party. While exploring appetizer options, I chanced upon the intriguingly named Crack Chicken Pinwheels and couldn’t resist giving them a shot. The outcome? An absolute sensation! The icing on the cake? They hardly demand any elaborate cooking!

Hardly had I placed the serving tray on the table when it was swiped clean! The symphony of flavors was just irresistible, leading to second, third, and maybe even fourth helpings. All night, my friends kept inquiring about this delightful recipe. Now, every time there’s a get-together, these pinwheels are a must-have.

Crack Chicken Pinwheels

Ingredients:

2 cups of cooked chicken, shredded (Leftover rotisserie chicken works wonders!)

8 ounces cream cheese, softened

1 cup cheddar cheese, shredded

½ cup bacon, cooked and crumbled

1-2 tablespoons ranch seasoning mix

1 tablespoon milk

4 large tortillas (Flavored ones like spinach or sun-dried tomato work well)

Instructions:

In a spacious bowl, meld together the chicken, cream cheese, cheddar, bacon, milk, and ranch seasoning. Stir until it’s a uniform blend.

Spread the tortillas and allocate the chicken blend equally. Ensure you leave a tiny border.

Commence the roll from one end, ensuring the filling remains intact and tight. Repeat for all.

Seal the tortilla rolls with plastic wrap and chill for 2 hours minimum, overnight for best results.

Before serving, convert the rolls into ½-inch pinwheels.

Display them beautifully on a tray and for an extra touch, sprinkle some green onions on top.

Whip up these Crack Chicken Pinwheels and watch as they become the talk of the party. The harmony of the delectable filling with the supple tortilla promises a gastronomical journey. Ready to be the most sought-after host? This recipe is your ticket! Enjoy and remember – you’ve been warned about their addictive nature!

Easy Creamy Corn Casserole

0

Can You Make Corn Casserole Ahead of Time?

Yes! You can make corn casserole up to two days in advance. Cover the cooled casserole tightly with storage wrap and store in the refrigerator. Reheat in an oven preheated to 300 degrees F for 10-20 minutes (or until warmed through).

Can You Freeze Corn Casserole?

Yes, you can freeze corn casserole for up to three months. Wrap the casserole in a layer of storage wrap, then in a layer of aluminum foil. Thaw in the refrigerator, then reheat in the oven or microwave.

Ingredients

  • 1 (15 ounce) can whole kernel corn, drained
  • 1 (14.75 ounce) can creamed corn
  • 1 (8.5 ounce) package dry cornbread mix
  • 1 cup sour cream
  • ½ cup butter, melted
  • 2 eggs, beaten

How To Make Easy Creamy Corn Casserole

Preheat the oven to 350 degrees F (175 degrees C). Lightly grease a 9×9-inch baking dish.

Mix whole and creamed corn, cornbread mix, sour cream, melted butter, and eggs together in a medium bowl until well combined. Spoon mixture into the prepared dish.

Bake in the preheated oven until the top is golden brown and a toothpick inserted in the center comes out clean, about 45 minutes.

Strawberry Cream Cheese Icebox Cake

0

Ingredients

  • 2 lb. strawberries
  • 2 sleeves graham crackers
  • 1 -8 oz. pkg. cream cheese, room temperature
  • 1 -14 oz. can sweetened condensed milk
  • 2- 3.4 oz. pkg. instant cheesecake flavored pudding
  • 3 cu. milk
  • 1- 12 oz. carton whipped topping, divided

How To Make Strawberry Cream Cheese Icebox Cake

  1. Wash, cut tops off of strawberries and slice them 1/4 inch thick then set aside. Line bottom of a 3-quart 13×9 baking dish with graham crackers and set aside. Combine cream cheese and sweetened condensed milk in a large bowl and beat with a mixer until smooth and creamy.
    Add pudding mixes and milk then continue mixing on low for 4-5 minutes or until mixture starts to thicken.
  2. Fold in 2 cups whipped topping until smooth. Pour half of the cream cheese mixture over graham crackers.
  3. Arrange a single layer of strawberry slices over cream cheese mixture. Top strawberries with another layer of graham crackers then cover with remaining cream cheese mixture.
  4. Top cream cheese mixture with another layer of strawberries.
    Cover and refrigerate for 6-8 hours. When serving, top with remaining whipped topping.
  5. Crush remaining graham crackers and sprinkle crumbs over the top

You’ve been doing it wrong. Here’s the easiest and hassle-free way of cooking bacon

0

Bacon lovers rejoice! We have discovered a game-changing method for preparing bacon that is not only incredibly easy but also remarkably neat. You no longer need to worry about oil splatters everywhere and dirtying your kitchen.

By following a few simple steps, you can achieve crispy, delicious bacon without any messy spatters. In this article, we will guide you through the process of cutting and cooking bacon to perfection, leaving you with a satisfyingly crispy and mouthwatering result.

Step 1: Gather your supplies
To begin, you’ll need a package of bacon of your choice. For those who enjoy bacon in large quantities, we recommend using four packages from Costco (or adjust the amount to suit your needs). Additionally, you will need a large pot with sides.
Step 2: Prepare the bacon
Open the package(s) of bacon and cut each slice in half. This step is particularly helpful when dealing with large quantities. By cutting the bacon in half, you create shorter strips that are easier to manage and ensure even cooking.

Step 3: Arrange the bacon in the pot

Once you’ve cut the bacon, separate the slices and place them in the pot. Make sure to distribute the bacon evenly, allowing each piece to have enough room to cook properly. Overcrowding the pot may result in uneven cooking and less crispy bacon.

Step 4: Apply heat and stir as needed

Set your pot on high heat and begin cooking the bacon. Stir the bacon occasionally using a spatula to ensure that it cooks evenly. As the heat intensifies, the fat from the bacon will start to melt, creating a deep-frying effect. This process gives the bacon a delightful crispiness while keeping it tender and flavorful. The fact you are doing this in a large pot avoids any splatters!

Step 5: Enjoy the delicious results

Continue stirring and monitoring the bacon until it reaches your desired level of crispiness. Remember that cooking times may vary depending on the thickness of the bacon and personal preferences. Once the bacon has reached the desired doneness, remove it from the pot using a slotted spoon or tongs, allowing any excess grease to drain.

Plantain: properties and benefits of this wild medicinal herb

0

For generations, the naturally abundant Ribwort plantain (Plantain lanceolata) has been a go-to remedy in our local traditions. Found almost everywhere in our countryside, this wild herb, a relative of the greater plantain with its broader leaves, has been cherished for its curative properties.

Historically, it was seen as an immediate remedy in many rural communities. An old saying went, “It’s quicker to reach for plantain than to visit the doctor”. Of course, this herb doesn’t replace medical advice, but its healing attributes are too valuable to overlook.

Packed with flavonoids, iridoids, mucilage, tannins, and minerals, Plantain lanceolata is revered for its multitude of health benefits including its soothing, expectorant qualities, mucous membrane toning, antispasmodic, healing, and hemostatic properties.

Here are some ways you can harness its benefits:

Tincture: Consume 3-5 ml (60 drops – 1 teaspoon) thrice daily to address catarrh or digestive ailments like gastritis or IBS.

Juice: Extract juice from its dried leaves. Take 2 teaspoons three times a day, useful for issues like cystitis, diarrhea, and respiratory infections. This juice can also be applied externally to wounds.

Infusion: Sip a cup thrice daily to combat phlegm or gargle with it to soothe a sore throat.

Syrup: Blend 225 grams of sugar with 300 ml of infusion. A teaspoon can alleviate a sore throat and coughing.

Poultices: Crush fresh leaves to create a paste that can be applied to slow-healing wounds, chronic ulcers, or insect bites.

The next time you come across this natural wonder, consider tapping into its wealth of healing properties. Nature always surprises us with its gifts.

Pillsbury Crescent Roll Taco Bake

0

Enjoy dinner collectively right away with this terrific clean 20-minute taco with Crescent Roll.No need for a crust or fuss with fancy fillings, you can even cook and bake ahead of time when you are done. Simply upload a few rice or a aspect salad, dinner is likewise served!

* Ingredients:

° 2 crescent fascia tubes

° 1 pound floor red meat (or floor turkey)

° 1 packet taco seasoning

° 1 half cups shredded cheddar cheese

° lettuce chopped

° 1 or 2 diced tomatoes

° half can olives, sliced, if desired

° bitter cream

° Avocado section (optional)

* a way to make it :

Put  tubes of crescent dough, thick facets inside.Use several crescent rolls on the left to make the center thicker. Grilled red meat with tacos.

Place the red meat in a round movement withinside the crescent roll

Add cheese to the top

Pull out the crescent roll and area it beneathneath the beef and cheese.In the middle of taco cheese, lettuce, tomatoes, olives, sour cream or whatever you like.

Follow the cooking time on a container of crescent rolls, and as soon as you are done, you are excellent to go!

Enjoy!